In the past, we've struggled a lot when trying to set an AWS Elastic Beanstalk instance to work with an SSL Certificate. Something that looks so simple and can give you a great headache. That's why today I want to tell you how to do it in three simple steps.
1. Request a certificate
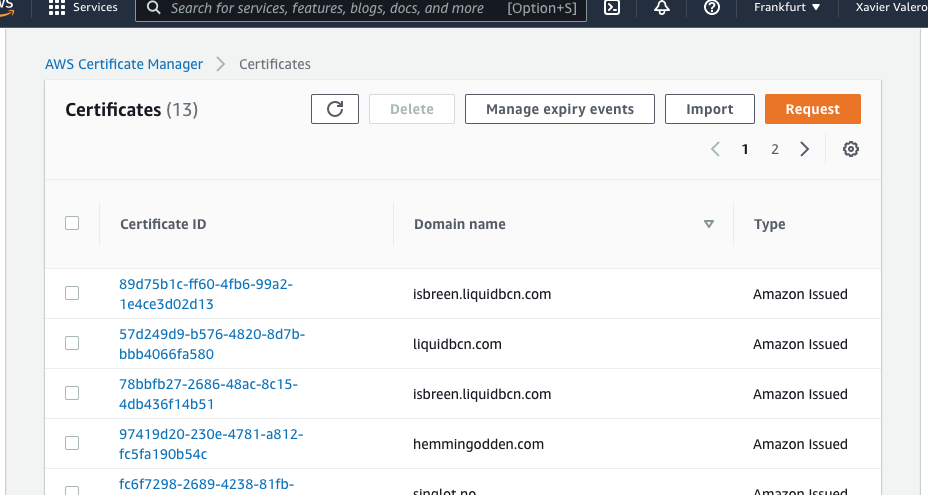
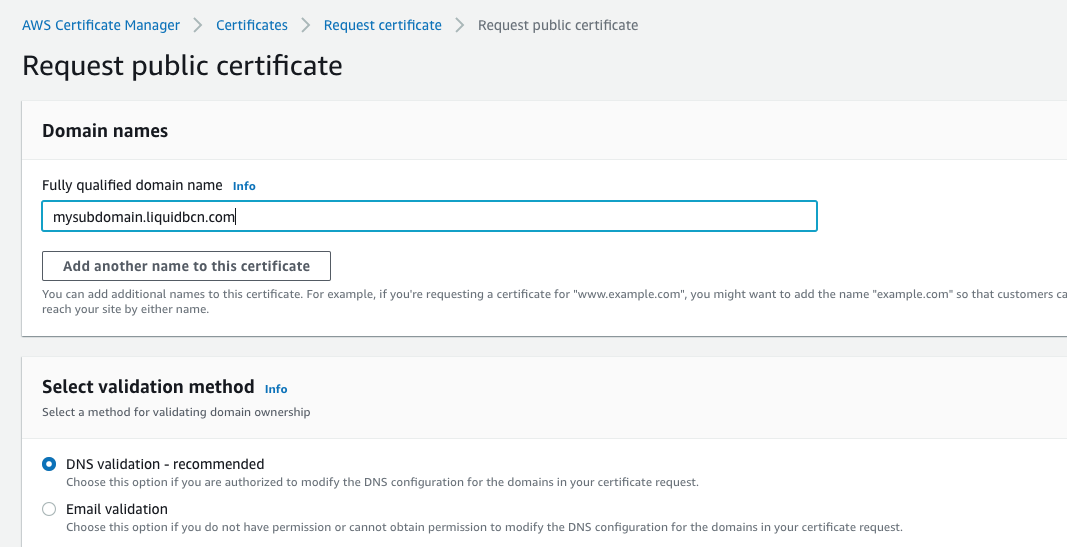
Go to the Certificate Manager section in AWS and request a new certificate.


2. Choose DNS validation
If you manage the DNS of your domain with Route 53 the process is much easier. You can create the records directly in Route 53 through the wizard. If you have another DNS provider you can create a CNAME with the name and value shown below.

3. Link it to your Elastic Beanstalk environment
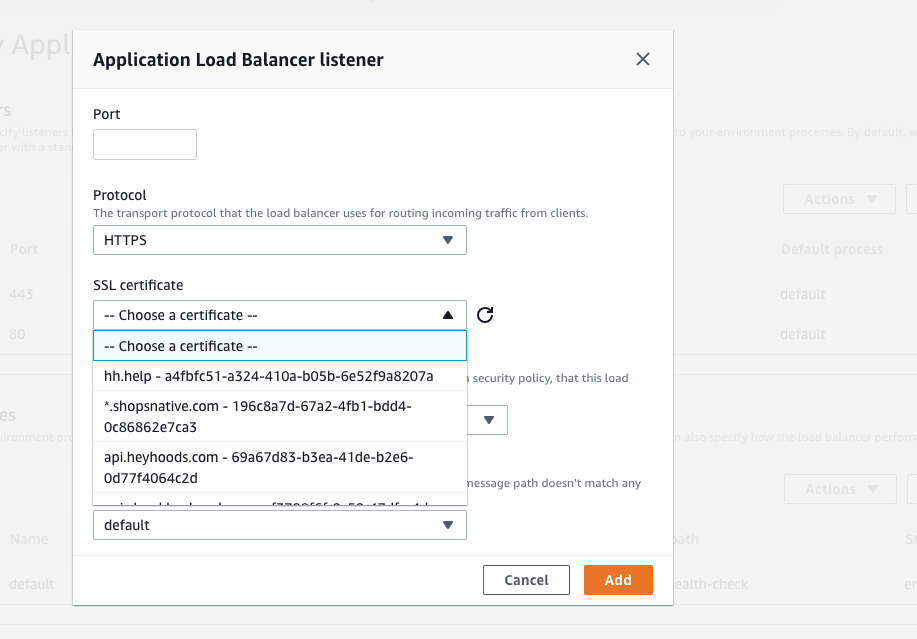
Go to your elastic beanstalk environment and choose Config, then Load Balancer Edit.


Then go to Add Listener, choose HTTPS protocol, select your certificate from the dropdown and type 443 in the port field.
Now you’re ready to serve your content with HTTPS.